
Are you an avid cyclist who loves the thrill of riding a tandem bike? If so, you probably already know that adding accessories to your tandem bike can enhance your riding experience and make your adventures even more enjoyable. From racks and baskets to lights and bells, there are countless accessories available to customize your tandem bike to meet your specific needs. But how do you install these accessories like a pro? we will take a deep dive into the world of tandem bike installation and share expert tips and tricks to help you become a pro at installing accessories on your tandem bike. So, grab your tools and get ready to elevate your riding experience to new heights!
The Basics: Introduction to Tandem Bike Accessories
Tandem bikes offer a unique riding experience, and installing accessories can enhance that experience even further. Whether you’re looking to add functionality, comfort, or style to your tandem bike, there are a variety of accessories available to suit your needs.
In this section, we will explore the basics of tandem bike accessories and how they can improve your riding experience. From handlebar accessories to pedal enhancements, we’ll cover a range of options to help you customize your tandem bike.
One important key phrase is “tandem bike accessories,” which encompasses the overall topic of this section. Another key phrase is “riding experience,” as it highlights the main goal of installing accessories on a tandem bike – to enhance the enjoyment and comfort of the ride.
When choosing tandem bike accessories, it’s essential to consider factors such as functionality, durability, and compatibility with your specific tandem bike model. Additionally, personal preferences and riding style should also be taken into account.
Stay tuned as we delve into the world of tandem bike accessories and guide you through the process of installing them like a pro.
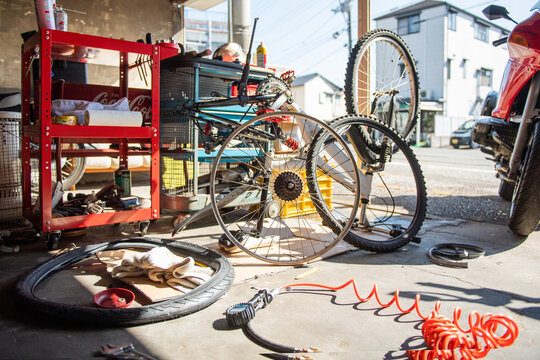
Essential Tools for Installing Tandem Bike Accessories
When it comes to installing accessories on your tandem bike, having the right tools is essential. Here are some important tools you’ll need to ensure a smooth installation process:
*Allen wrench set*: This versatile tool is a must-have for any bike owner. It’s used to tighten bolts and screws, which you’ll encounter when installing various accessories.
*Adjustable wrench*: This tool will come in handy for tightening nuts and bolts that require a larger grip than an Allen wrench can provide.
*Screwdriver set*: Different types of screws may be used in accessory installation, so having a set of screwdrivers with various sizes and heads will ensure you have the right tool for the job.
*Pliers*: Pliers are useful for gripping and holding small parts during installation, as well as bending wires or cables if needed.
*Tire levers*: If you’re installing accessories that require removing or adjusting the tires, such as fenders or mudguards, tire levers will make the process much easier.
*Grease*: Applying grease to threads and contact points can prevent rusting and make future adjustments easier.
Having these tools readily available will save you time and frustration during the installation process. Remember to always refer to the manufacturer’s instructions for specific tools required for each accessory.

Step-by-Step Guide: Installing Handlebar Accessories on a Tandem Bike
Installing Handlebar Accessories on a Tandem Bike
When it comes to installing handlebar accessories on your tandem bike, there are some essential steps you need to follow. First, make sure you have the necessary tools handy, including an Allen wrench set and a screwdriver.
Start by removing the existing handlebar grips or tape from both ends of the handlebars using a flathead screwdriver. This will provide access for attaching new accessories.
Next, identify the specific accessory you want to install, such as a bell or cycling computer mount. Most handlebar accessories come with brackets or clamps that easily attach to the handlebars.
Securely fasten the accessory in place using screws or bolts provided with the kit. Make sure it is tightly attached to ensure stability during rides.
After installing each accessory, test its functionality by adjusting and manipulating it. Ensure that it doesn’t interfere with your steering or hand positioning while riding.
Remember that maintaining proper balance between both riders’ needs is crucial when placing handlebar accessories on a tandem bike.
Unlocking the Potential: Enhancing Your Tandem Bike with Pedal Accessories
Enhancing Comfort and Efficiency: Upgrading Pedals for Your Tandem Bike
Upgrading the pedals on your tandem bike can greatly enhance both comfort and efficiency during your rides. By replacing the stock pedals with high-quality ones, you can ensure a secure grip and optimal power transfer, especially when tackling challenging terrains or riding at higher speeds. Look for pedals that offer features like a larger surface area, adjustable cleats, and durable construction to withstand the demands of tandem cycling. Additionally, consider clipless pedal systems that allow you to connect your shoes directly to the pedals for increased stability. Don’t overlook this opportunity to maximize your riding experience by investing in top-notch pedals tailored specifically for tandem bikes.
Keeping in Sync: Installing Clipless Pedal Systems on a Tandem Bike
For tandem bike riders looking to improve their cycling experience, clipless pedal systems are a common option. These pedal systems enable a more effective power transfer from the rider to the bike, improving speed and control. On a tandem bike, installing clipless pedals is a straightforward process that only needs a few crucial steps. Make sure you have the necessary tools first, such as an Allen wrench and pedal wrench. After that, use the appropriate wrenches to take the bike’s existing pedals out. Then, secure the cleats in place by aligning them on the pedals of your cycling shoes. Last but not least, change the pedal’s tension to the level of resistance. You and your partner can ride your tandem bike more freely and safely with clipless pedal systems installed.
Putting the Power Down: Exploring the World of Power Meter Pedals for Tandem Bikes
Power meter pedals are a game-changer for tandem bike enthusiasts, providing valuable insights into your cycling performance. These high-tech accessories measure your power output and help you optimize your training and racing efforts. With power meter pedals, you can track important metrics like cadence, power balance, and pedal smoothness. Installing power meter pedals on your tandem bike is a straightforward process that requires a few essential steps. Start by removing the existing pedals using a pedal wrench or Allen key. Then, carefully attach the power meter pedals to the crank arms, ensuring they are securely tightened. Once installed, pair the pedals with a compatible cycling computer or smartphone app to start recording and analyzing your power data. Get ready to take your tandem cycling experience to new heights with the precision and performance offered by power meter pedals.
Tailored Fit: Customizing Toe Clips and Straps to Maximize Performance
When it comes to enhancing your tandem bike’s performance, customizing toe clips and straps can make a significant difference. Toe clips are metal or plastic cages that attach to the front of your pedals, allowing you to secure your feet in place. Straps are adjustable bands that go over the top of your foot and attach to the toe clips, providing additional support and stability. By customizing these accessories, you can achieve a tailored fit that maximizes power transfer and efficiency while pedaling. Adjusting the position and tension of the straps can help prevent foot slippage and ensure a comfortable riding experience. Experiment with different adjustments until you find the perfect fit for your feet and riding style.
Saddle Up: Installing Comfortable Seats on Your Tandem Bike
Installing comfortable seats on your tandem bike is essential for a enjoyable and pain-free ride. Choosing the right seats is crucial, as they will directly impact your comfort and posture during long rides. Look for seats that provide ample cushioning and support, with adjustable features to accommodate different riders. Proper seat installation involves removing the existing seats and attaching the new ones securely to the seat post using a wrench or Allen key. Ensure that the seats are aligned properly and tightened to prevent any wobbling or shifting during rides. It’s also important to adjust the seat height and angle to suit your riding style and body mechanics. Take the time to experiment with different adjustments until you find the most comfortable position. Remember, a well-installed and comfortable seat can make all the difference in enjoying your tandem bike adventures!

Safety First: How to Install Lights and Reflectors on a Tandem Bike
The Importance of Lights and Reflectors on a Tandem Bike
Lights and reflectors are crucial for ensuring the safety of riders on a tandem bike, especially in low-light conditions or at night. These accessories make you more visible to other road users, reducing the risk of accidents. By illuminating your path ahead, lights provide better visibility, allowing you to navigate safely even in dimly lit areas. Additionally, reflectors act as passive safety measures by reflecting light from car headlights or street lamps back toward drivers. This alerts them to your presence on the road and gives them more time to react accordingly. Investing in high-quality lights and reflectors is essential for all tandem bicycle enthusiasts looking to prioritize their safety during rides.
Key phrases:
- Safety of riders
- Visibility and accident prevention
Choosing the Right Lights and Reflectors for Your Tandem Bike
When it comes to ensuring safety on your tandem bike, installing the right lights and reflectors is crucial. Not only do they make you more visible to others on the road, but they also enhance your overall riding experience. Choosing the right lights and reflectors is key to meeting both legal requirements and personal preferences.
- *Lights: Opt for high-quality front and rear lights that provide sufficient illumination* in various conditions. Consider features like brightness levels, beam patterns, battery life, and mounting options.
- *Reflectors*: Look for reflective stickers or tapes that can be easily attached to your bike frame, pedals, wheels, or clothing. Make sure they meet visibility standards and are strategically placed for maximum effectiveness.
By selecting reliable lights and reflectors suited to your needs, you’ll ride with confidence knowing that both you and your tandem bike are visible to others on the road.
Enhancing Visibility: Adding Reflectors to Your Tandem Bike
Adding Reflectors to Your Tandem Bike
Enhancing visibility is crucial for safe riding, especially when it comes to tandem bikes. By adding reflectors to your tandem bike, you can significantly improve your visibility to other road users, reducing the risk of accidents. Here are two key steps to follow when installing reflectors:
*Choose the right reflectors*: Look for high-quality reflectors that meet safety standards. Opt for reflective stickers or adhesive-backed reflectors that can be easily attached to various parts of your bike, such as the frame, pedals, wheels, and handlebars.
*Proper placement: Ensure that the reflectors are strategically placed in areas where they can catch the attention of drivers and pedestrians from different angles*. Attach them in a way that they are visible from both the front and rear of the bike.
Remember, installing reflectors is a simple yet effective way to enhance your tandem bike’s visibility and ensure a safer riding experience.

Streamlined Style: Adding Fenders and Mudguards to Your Tandem Bike
Your tandem bike needs fenders and mudguards to stay clean and dry during wet rides. These accessories not only guard against splashes and mud, but they also aid in preventing water from entering the moving parts of your bike, lowering the risk of rust and damage.
On a tandem bike, installing fenders is only a few easy steps. First, pick fenders that fit your bike’s wheel size. Then, using the hardware provided, fasten the brackets to the fork or frame. Verify that the fenders are properly aligned and make necessary adjustments. To ensure a stable fit, securely tighten all the bolts.
On the down tube or seat tube of your tandem bike, mats are typically installed. They are made to catch any dirt or debris that might be kick-up by your tires. Use zip ties or mounting brackets to fasten mudguards to the ground. To ensure that they offer sufficient coverage without interfering with your pedaling, adjust their position.
Keep in mind that clearance for your tires and any additional accessories you might have on your tandem bike is crucial when installing fenders and mudguards. Take your time during installation to ensure a proper fit and take advantage of a cleaner, more comfortable ride!
Soundtrack of Your Ride: Tips for Attaching Speakers or Music Systems to a Tandem bike
Adding speakers or a music system to your tandem bike can enhance your riding experience and create a fun atmosphere. To attach speakers or a music system to your tandem bike, you will need a few key components:
*Bluetooth Speaker/Music System*: Choose a compact and weather-resistant speaker or music system that can withstand the vibrations and outdoor conditions while providing good sound quality.
*Mounting Bracket*: Look for a sturdy mounting bracket that can securely hold the speaker or music system in place on your tandem bike. Ensure that it is compatible with the size and shape of your chosen speaker.
*Power Source: Determine how you will power your speakers or music system. Options include using rechargeable batteries, connecting to a portable power bank, or utilizing the bike’s electrical system* if available.
Once you have gathered the necessary components, follow these steps to install speakers or a music system on your tandem bike:
Identify the ideal location for mounting the speakers, considering factors such as visibility, accessibility, and safety.
Attach the mounting bracket securely to the chosen location on your tandem bike using appropriate tools.
Place the speaker or music system onto the mounting bracket and ensure it is firmly secured.
Connect any necessary cables or wires according to the manufacturer’s instructions, ensuring proper functionality.
Test the speakers or music system before heading out on your ride to ensure everything is working correctly.
Remember to consider noise regulations in your area and be mindful of others when using speakers or playing music while riding your tandem bike. Enjoy cruising along with your favorite tunes!
installing accessories on a tandem bike doesn’t have to be a daunting task. With the right tools and knowledge, you can easily enhance your riding experience and make your tandem bike more versatile and functional.
Remember to always start with the basics, familiarize yourself with the different types of accessories available for tandem bikes, and invest in essential tools for installation. Take it step by step when installing handlebar accessories, pedal enhancements, comfortable seats, lights and reflectors, fenders and mudguards, racks and bags or speakers/music systems.
If you encounter any challenges along the way, refer to our troubleshooting section for helpful tips. And most importantly, enjoy the process! Installing new accessories is not only practical but also allows you to personalize your tandem bike according to your preferences.
So go ahead – unlock the full potential of your tandem bike by adding those extra touches that will elevate both form and function. Happy riding!